11
Ich versuche Textviews über Bildansichten Overlay haben. So etwas wie diesesText-Overlay über Bildansicht in Android
Kann mir jemand mit dem Code helfen.
Ich versuche Textviews über Bildansichten Overlay haben. So etwas wie diesesText-Overlay über Bildansicht in Android
Kann mir jemand mit dem Code helfen.
Ich hatte das gleiche Problem und löste es eine benutzerdefinierte Gridview verwenden. Sie müssen dies in getView anwenden.
Benutzerdefinierte Gridview XML:
<?xml version="1.0" encoding="utf-8"?>
<FrameLayout xmlns:android="http://schemas.android.com/apk/res/android"
    android:id="@+id/layout_practitioner"
    android:layout_width="match_parent"
    android:layout_height="match_parent"
    android:orientation="vertical" >

    <ImageView
     android:id="@+id/item_image"
     android:layout_width="match_parent"
     android:layout_height="match_parent"
     android:scaleType="centerCrop"
     android:contentDescription="@string/contentDescriptionContent"
    />

    <LinearLayout
     android:id="@+id/layout_login"
     android:layout_width="match_parent"
     android:layout_height="match_parent"
     android:orientation="vertical"
     android:layout_gravity="center"
     android:background="#CC515116"
     android:visibility="gone"
     android:gravity="center" >

      <TextView
       android:layout_width="wrap_content"
       android:layout_height="wrap_content"
       android:textColor="@android:color/white"
       android:text="@string/text_enter_pass_password"
       android:paddingBottom="7dp"
       android:textSize="20sp"
      />

      <EditText
       android:id="@+id/edit_practitioner_pin"
       android:layout_width="wrap_content"
       android:layout_height="40dp"
       android:layout_gravity="center"
       android:background="@drawable/edittext_shape"
       android:ems="6"
       android:gravity="center"
       android:inputType="numberPassword"
       android:maxLength="4"
       android:layout_marginBottom="10dp"
       android:layout_marginTop="10dp"
       android:visibility="visible"
      />

      <Button
       android:id="@+id/pract_button"
       android:layout_width="70dp"
       android:layout_height="30dp"
       android:background="@drawable/buton_shape"
       android:layout_marginBottom="35dp"
       android:text="@string/btn_ok"
      />
    </LinearLayout>


<LinearLayout
    android:layout_width="match_parent"
    android:layout_height="wrap_content"
    android:orientation="vertical"
    android:layout_gravity="bottom"
    android:background="#bbffffff"
    android:focusable="false"
    android:focusableInTouchMode="false" >

    <TextView android:id="@+id/item_text"
     android:layout_width="match_parent"
     android:layout_height="wrap_content"
     android:layout_marginTop="3dp"
     android:textColor="@color/text_black"
     android:gravity="bottom|center"
     android:textSize="20sp"
     android:textAllCaps="true"
     android:paddingBottom="0dp"
     />

    <TextView
     android:id="@+id/text_pratiotioner_group_name"
     android:layout_width="match_parent"
     android:layout_height="match_parent"
     android:textColor="@color/sub_title_color"
     android:visibility="visible"
     android:gravity="bottom|center"
     android:textAllCaps="true"
    />

</LinearLayout>

</FrameLayout>
Umschließen Sie TextView und ImageView in FrameLayout, fügen Sie die TextView in FrameLayout nach ImageView ein. Wickeln Sie dann das FrameLayout in RelativeLayout OR LinearLayout. Nehmen Sie eine Positionseinstellung vor (je nach Bedarf).
<RelativeLayout>
    <FrameLayout>
     <ImageView />
     <TextView />
    </FrameLayout>
</RelativeLayout>
Bitte ändern Sie das Layout entsprechend, wenn Sie die Bilder auf einem Imageview nur aufnehmen möchten, dann können Sie auch das unten stehende Layout in einer relativen man mit einem Imageview fallen.
<LinearLayout

     android:layout_width="wrap_content"
     android:layout_height="wrap_content"
     android:background="@drawable/your_image"
     android:orientation="vertical" >
    <TextView
     android:id="@+id/bottom_textview"
     android:layout_width="fill_parent"
     android:layout_height="fill_parent"
     <!-- layout_gravity="supply accordingly" -->
     android:gravity="center"/>

</LinearLayout>
Sie können ein Frame-Layout erstellen und im Rahmen Layout einen Imageview halten und ein Linearlayout (mit einem durchscheinenden Hintergrund und ein Textview).
Die transluzente Farbe kann in den Farben gesetzt werden Datei wie: # 80000000 Hier ein Ausschnitt ist :)
<FrameLayout
      xmlns:android="http://schemas.android.com/apk/res/android"
      android:id="@+id/mainlayout"
      android:layout_width="fill_parent"
      android:layout_height="fill_parent"
      android:foregroundGravity="bottom"
      android:orientation="vertical" >

      <ImageView
       android:id="@+id/ivFullScreenAd"
       android:layout_width="fill_parent"
       android:layout_height="fill_parent"
       android:layout_marginBottom="8dp"
       android:src="@drawable/home_page_ad" />

      <LinearLayout
       android:layout_width="fill_parent"
       android:layout_height="wrap_content"
       android:layout_gravity="bottom"
       android:background="@color/translucent"
       android:orientation="vertical" >

       <TextView
        android:id="@+id/detailTitle"
        android:layout_width="wrap_content"
        android:layout_height="wrap_content"
        android:layout_gravity="left"
        android:paddingLeft="10dip"
        android:textAppearance="?android:attr/textAppearanceLarge"
        android:text="Please swipe up"
        android:textColor="@color/white"
        android:textIsSelectable="true"
        android:textSize="20sp" />
      </LinearLayout>
     </FrameLayout>
Obwohl eine alte Frage sollte aber incase jemand in der Kartenansicht Version dieser Frage hier interessiert ist, gehen Sie ...
<android.support.v7.widget.CardView
    android:layout_width="wrap_content"
    android:layout_height="wrap_content"
    app:cardCornerRadius="5dp"
    app:cardElevation="5dp"
    android:layout_weight="0.5"
    app:cardPreventCornerOverlap="false"
    app:cardUseCompatPadding="true"
    android:clickable="true">

    <FrameLayout
     android:layout_width="match_parent"
     android:layout_height="wrap_content"
     android:orientation="vertical"
     android:gravity="center_vertical"
     android:layout_centerInParent="true">

    <RelativeLayout
     android:layout_width="match_parent"
     android:layout_height="wrap_content"
     android:padding="16dp"
     android:background="#89969F">
    <ImageView
     android:id="@+id/iv_overlay"
     android:layout_width="196dp"
     android:layout_height="196dp"
     android:clickable="true"
     android:src="@drawable/your_image"
     android:layout_centerInParent="true" />


    </RelativeLayout>

     <LinearLayout
      android:layout_width="fill_parent"
      android:layout_height="wrap_content"
      android:layout_gravity="bottom"
      android:background="#80000000"
      android:orientation="vertical" >

      <TextView
       android:layout_width="wrap_content"
       android:layout_height="wrap_content"
       android:singleLine="true"
       android:textSize="22sp"
       android:textStyle="bold"
       android:gravity="center_vertical"
       android:text="Settings"
       android:textColor="@color/white"
       android:layout_gravity="center"
       android:layout_alignParentTop="false"
       android:layout_alignParentBottom="true"
       android:layout_centerHorizontal="true"
       android:padding="8dp" />

     </LinearLayout>
    </FrameLayout>
</android.support.v7.widget.CardView>
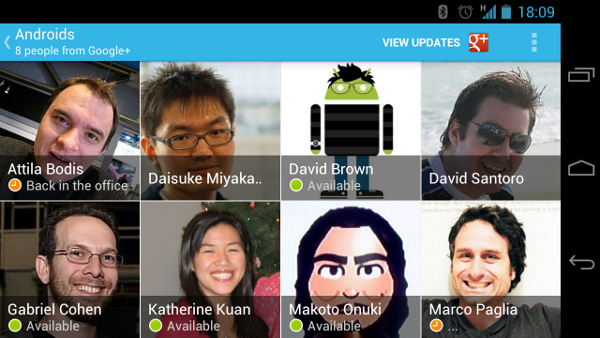
danke :) Aber ich bin nicht in der Lage, den Abstand zwischen den beiden Karten zu verwalten. Ich brauche auch die Bilder/Karten nahe beieinander, wie auf dem Bild in der Frage gezeigt. Aber ich sehe horizontale und vertikale Lücken. Alle stretchMode-Kombinationen wurden getestet. Jede schnelle Lösung? – AndroidGuy
wenn ich dich richtig verstehe! Sie wollen nicht den Abstand zwischen den Karten. Wenn JA, ersetzen Sie 'android.support.v7.widget.CardView' durch 'RelativeLayout' '. Das sollte die Grenzen entfernen, die Sie sehen. Sie werden durch das card view-Attribut 'cardElevation' verursacht. –
ok .. aber ich muss Karten verwenden. Ich werde versuchen, das cardElevation-Attribut zu entfernen und zu aktualisieren. Vielen Dank !! – AndroidGuy
Haben Sie die gridview haben Konfiguration? – kabuto178
Nein, aber ich denke, ich kann das verwalten –
Dann könnten Sie ein benutzerdefiniertes XML mit frameLayout oder relativeLayout erstellen und eine Textansicht über eine Bildansicht positionieren und es in Ihrem Gridview-Adapter aufblasen – kabuto178